Make This: Grandmother’s Flower Garden Hexagons by Machine Tutorial
If you’ve ever made–or started– a Grandmother’s Flower Garden Quilt, you know that it is very time intensive if done by hand. We love to do English Paper Piecing, especially for applique or embellishment (click here for our English paper piecing tutorial), but finishing an entire quilt by hand can be overwhelming at best.
Today we will show you how this can be easily done by machine.
We are using 1 1/2″ hexagons to make one main flower. You will need some springtime fabric in three colors, a background fabric, a marking tool, and basic sewing supplies including your sewing machine. If you don’t have the paper hexagons, just Google “hexagon shapes” and you can print them in any size on cardstock.
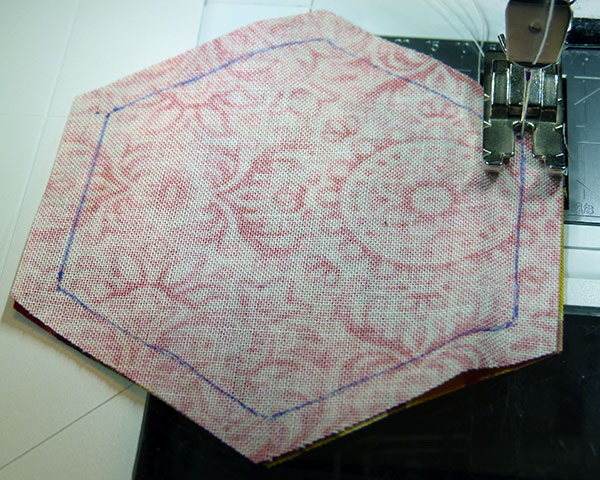
Place the 1 1/2″ hexagon on the back of your flower center fabric and trace around it. We like the Fusion Pens because they are easy to use and see, then the heat from the iron makes them disappear.

Trim the edges of the hexagon to 1/4″. Of course, this can be done with scissors, but precision is important here and trimming them uniformly makes sewing much faster.
For the large flower you will need: 1 flower center, 6 of the first row and 12 of the outside row.
Begin sewing precisely at the corner with a tack stitch to hold.
If you have the knot button on your machine, this is a good time to use it.
End and tack precisely at the other corner of your seam marking.
Add the next piece to the flower center and sew in the same way.
Sew the side seams of the second row color to each other, making sure to start and stop at the 1/4″ seam markings.
It should look something like this.
And this. . . looking good so far?
Now sew the remaining first row to the center and sew the side seams in the same way until all six are in place. If you are impatient or efficient, and you are used to chain piecing, the outside row can be sewn together in pairs. Do them in between each seam and you won’t have to cut the thread each time.
Pairs of outside row in waiting.
The flower center is complete and the six pairs of the outside row are matched up and ready to sew.
Pin one of each pair to each of the first row pieces. Do this first with the seams that run parallel to each other around the center. The other piece will fill in the triangle part.

Continue sewing the outside row to the first row, and then sew the matching side seams of the outside row together. Your finished flower will look like this.
If using the design by itself, you will want to finish the outside edge. It can be basted by hand with a 1/4″ hem or it can be pressed later. If you are going to make several to fit together, omit this step and give yourself a prize.
Press all seams flat and press outside hem, unless you are going to make more of these to sew together in an interlocking fashion.
Turn the flower over and press from the right side, making sure all seams and corners lay flat.
We are sewing it to a background to use for a pillow, but you could continue at this point with more hexagons to make the background of your design.
If your machine does fancy crazy-quilt stitches, this is a good time to throw some on.
And also a good time for a machine blanket stitch around the outside edge.
The finished flower on the background fabric. Looks like it took hours. . . say it did.
This flower can also be sewn onto a background fabric with embroidery floss and a hand blanket stitch. We like to save this kind of work for Masterpiece Mystery.
Do several and voila! You have a cheater quilt that looks like the real thing! Who knew it could be this easy? Use some Easter fabric and Betty’s green for the traditional look. Use the paper hexagon pieces for spacing as you pin or glue each flower in place. Quilt where the seam lines would be and it looks pretty convincing.
We have admired this pattern for such a long time. After starting one by hand, we could see that it may never get finished. Then the idea to sew the flowers onto a background fabric appeared like manna from heaven. This project is almost done and Grandmother would be so proud!
-Diane


This is great ! I want to so one of these so bad! Thanks for making it look so fun and easy ! I got it Pinned!
You’re welcome! Good luck with your project.
Just love this alternative! And Betty’s green is perfect
Thanks! We love Betty’s green!